A guest post from conservator, Jenny Mathiasson
At the 2024 Museums + Heritage Show in London, I had the pleasure of sharing my top six (because of course it couldn’t be five, that would be too easy!) tips for what to keep in your emergency preparedness kit.
I’ve seen my fair share of collections-based emergencies, big and small, so here are the most essential items (or categories of items) for your institution’s kit:
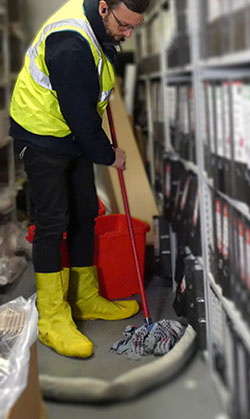
1) PPE (Personal Protective Equipment)
This should surprise nobody, but it’s worth shouting from the rooftops: always protect your people first.
We’re more valuable than even the most priceless collection: I know, that’s borderline blasphemy. So PPE is the top priority: good quality nitrile gloves (nobody wants split gloves in sewage water), face masks, wellies, hi-vis… The exact PPE needed for your institution will vary, so I won’t be prescriptive in that sense, but your people’s safety should be paramount. No conservator can fix a mouldy lung or tetanus!
Go to PPE
2) Absorbent Things
A wonderful blanket category: anything that absorbs water and isn’t your collection is your friend here.
I’ve seen people include a lot of things, some more reusable than others: absorbent snakes and pads that soak up exceptional amounts of liquid are your standard fare in this category. I’ve heard institutions keep spare packs of puppy training pads, incontinence products, and expired wound dressings (the ones you have to regularly chuck out of your first aid kits) on hand too!
For an affordable and sustainable touch, I recommend reuse: ask staff and volunteers to bring in unwanted clean rags, old bedding, clothes past their best, knackered towels, basically anything you can make rags from.
Make friends with local businesses if you can: hotels and hospitality places may be happy to pass on their old clean towels to your stash if they’re no longer looking their best for guests.
Go to Absorbent products
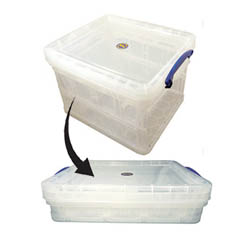
3) Collapsible Things
You know the kind of folding or collapsible things you might find in the car aisle of the supermarket or in a camping store? I love those sorts of places. They’ve got to be compact for storage, lightweight for travel, often water-proof, and easy to deploy: it’s kind of everything we want in our emergency kits!
Genius products I’ve found or been told about include: collapsible traffic cones (for marking your trip hazards), deployable buckets and washbowls (need I say more?), folding crates (only suitable for lightweight salvage, but still handy), even pop-up sinks and laundry baskets.
Have a little wander around your local outdoorsy shop next time you see one: you’ll almost certainly feel inspired ahead of your next leaky roof!

4) Things That Light Up the Dark
Our workplaces can be gloomy at the best of times, but if the power is out or the electrics are unsafe, then low-light becomes properly dark: this is when we need to whip out our alternative light sources!
While most of us have smartphones with torches, they may not be the best option for an emergency situation: instead, a wind-up torch, pre-charged LED battery-powered headlamp, or even a button-cell mini torch might fit your kit better. We don’t have to have hefty torches powered by easily-expired D-cell batteries anymore: upgrading to modern ones that are more easily managed costs very little and saves you a lot of frustration.
A more fun addition to your kit is glow sticks: while these do expire, they can be a great way of marking scattered objects, hazards, or even people when you need to.
Go to Lighting products
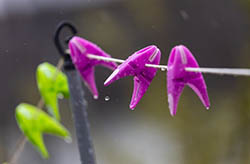
5) Something That Creates a Washing Line
When you’ve had water ingress and things need to dry quickly, my favourite first activity is finding a safe place to string up washing lines: small items that can withstand it can be instantly drying and out of the way (photographs, pamphlets, lightweight items) with very little effort.
If your kit doesn’t have a ball of string, some scissors, and some clothes pegs in it, that’s a low-cost win you can solve with a quick trip to Poundland or your nearest supermarket. You can go more upmarket if you’d like: I’ve heard people use paracord or cotton tape, but good old-fashioned string will do.
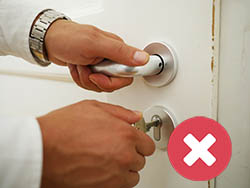
6) A Friend in a Tight Spot: The Door Stop
This is by far my favourite easy win that we can all afford and squeeze into almost any size disaster kit: a simple door stop, one of those little plain wedges, will usually do.
You know what you absolutely don’t want when you’re running backwards and forwards with either salvage crates or buckets of mucky water? A door hitting you on the butt on the way out; a door slamming in your face exactly when you don’t need it; or a fellow volunteer on hold-the-door-open duty for the entire duration of the event (whatever is happening to that gallery or storeroom this time). And it’s so easy to solve!
I hope that provides you with some inspiration for your next disaster kit review.
Final Thoughts
While I was at it, I also shared my thoughts on what makes a good disaster kit: above all else, it should be portable (because relatively few disasters will happen conveniently next to where you’ve popped your kit), either in part or as a whole – and accessible.
That last one is a big bugbear of mine: we love keeping our emergency kits stowed away, under lock and key, and on a need-to-know basis. If we did that with first aid kits or defibrillators, we’d be quite rightly told off, but somehow we allow ourselves this odd approach to our emergency gear. A locked box serves nobody, a hidden kit saves nothing - let’s do better!