This is PART 1, of our photographic process identification article, Part two is available here. If you don't already receive our email newsletter - please subscribe here
Why it's important, and how to do it...
Why do you need to identify what type of photograph that you have?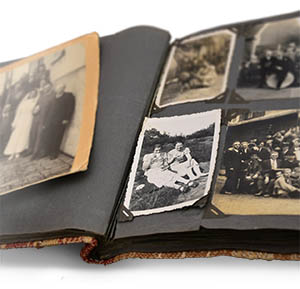
It is important because the identification of photographic processes is key to preserving your photographs. If you don't know what you have, how can you look after it?
Identification of the photographic process will aid your decision on what storage materials to use, how to handle your photographs and what environmental conditions to keep them in.
To give you some examples; plastic based negatives should only be stored in paper enclosures never in plastic, the only way to preserve colour photographic processes is to freeze them, and cyanotypes should never be stored in buffered papers (if you're not sure what buffered means, you can read about it here).
We've just mentioned 3 different storage requirements for 3 different processes. In the course of photographic history over 150 processes have been described which shows the care you need to take when identifying. That said, many of these are obscure and idiosyncratic variations of the major processes, so it's best not to worry too much about these. Instead, concentrate on identifying the major processes such as albumen prints, wet collodion positives, gelatine prints, gelatine dry plate negatives and so on. Part two of this blog post shows a timeline of the most popular processes.
What is a photograph?
Photograph means 'writing with light'. A photograph is created when light sensitive salts which have been coated onto a 'support', such as; paper, glass or plastic, are exposed to light. You may be wondering why you need to know this? Well, identification of photographic processes is complicated by the introduction of photomechanical processes in the late nineteenth century. Photomechanical prints look like photographs but are made by impressing or transferring the image to paper by mechanical means. Photomechanical prints can look remarkably like true photographic prints such as albumen prints or platinotypes.
What do you need to identify your photographic processes?
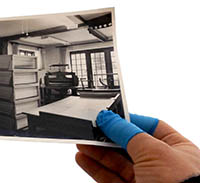
When you start identifying your photographic processes, first of all make sure the area where you are working with your photographs is clean, that you have plenty of space, that you are wearing nitrile gloves or finger cots and that you make notes in pencil. It's far easier to erase an accidental pencil mark from a photograph than it is to remove ink!
Make sure that you are working in good light. The colour of the photographic print is one of the ways you can identify processes, and some forms of lighting (like fluorescent tubes or bulbs) can alter the colour that you see. Examination of your photographs in daylight is best, or alternatively, especially in the UK during the winter, a 'daylight' lamp is about as close as you will get. Something like this studio lamp with a colour temperature of 6000k and a CRI of 80 or above would be suitable.
Thankfully, identification can be achieved in most cases without the aid of expensive equipment. The most useful tool in identifying photographic processes are your eyes. The basic tools that you need are an inexpensive hand held x 10 magnifier like this one. Using a microscope will enable you to identify processes more accurately. A 20X – 30X microscope is best


Where do you start?

To start identifying the processes that your photographs are made from, take your photograph and - look at it!
- Who is in the photograph? If they are relatives, you may be able to ascertain who they are, that may give you a date for when the photograph was likely to have been taken.
- What are they wearing? Fashions change over time (thank goodness!). For example; from the 1860s sailor suits were popular for boys, boaters were popular for men between 1890 and 1900.
- How is their hair styled? If they are wearing jewellery what style is it? Again, all these details change over time. From the 1850s to the 1860s women wore their hair with a central parting with their ears covered, by the 1900s this had changed to wearing their hair high on their head.
- Look at the backdrop - is it a painted backcloth to look like outside or, is it really taken outside? Is it just a curtain? Are there any props such as bicycles, chairs or tables. These styles all change over time. From 1880 to 1890 oriental screens were popular. From 1885 bicycles start to appear in photographs.
- Also look at the style of the photograph. Are the people in it sitting, standing, moving? The style of photographs change. Photographs until close to the end of the nineteenth century were taken by a professional photographer and tend to look posed. After this, photography became more accessible to amateurs and so the composition and style of the photograph changes. Changes to the cameras and the process also affect the style of the photograph. The changing technology generally allowed the photography to become more free.
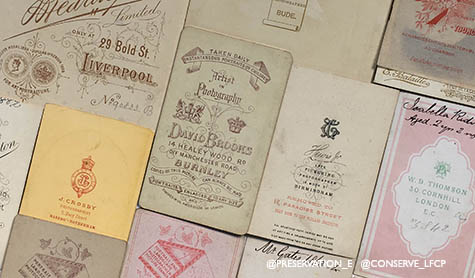
 Turn your photograph over and look at the back. A lot of information was printed on the back of studio photographs such as the photographer's name, their studio and details of how to order prints. You can search for the photographer's details and this may give you information on when and where they were working.
All of the information that you get from simply looking at your photograph will help you to date your photograph, or at least place it at a rough point in history such as between 1870 and 1885. Only certain types of photographic processes are in use at any one time, dating the photograph will help you narrow down the type of process that could have been used and may be enough to identify the process.
Is it a negative or a positive?
Identifying your photograph as a negative or a positive will instantly reduce the number of processes that you have to choose from.

Deciding whether your photograph is a negative or a positive is not always as easy at it sounds. It was discovered that by putting a black backing behind a wet collodion negative it would become a positive. Cased wet collodion positives were in use from the 1850's to the 1870's.
Support and presentation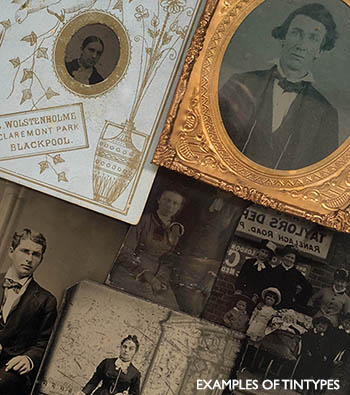
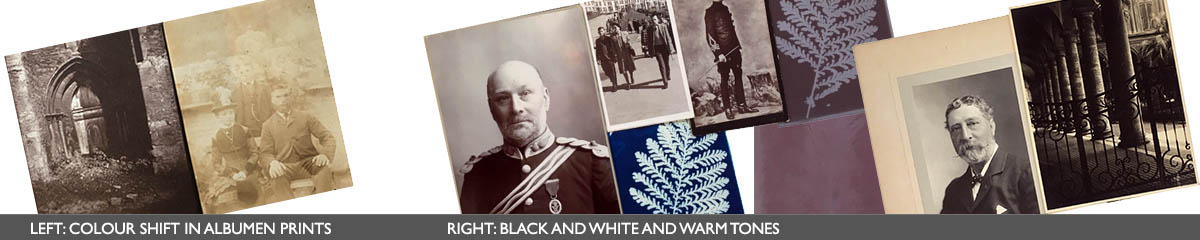
The next step to take is to look at what support is it on? Is it on paper, glass, plastic or metal? Over the course of photographic history almost every type of material has been used to make photographs on including; leather, textile and ceramics, but the most common materials are; paper, glass, metal and plastic. Deciding what support the photograph is on is useful because some photographic processes are only made using a particular type of support. For example; daguerreotypes and tintypes are always on metal, wet collodion positives are always on glass. Various examples of tintypes are in the picture here.
Next look at how the photograph is presented. Has it been stuck to a card, is it in a case? Colours of cards used, whether the corners are rounded or square, types of cases and the decoration of the cases all change with time. Again, you can use this to date your photograph which will allow you to narrow down the type of process it may be.
To give you some examples, carte de visite and cabinet cards had square cut corners from the late 1850s; from the late 1860s they were generally on cards with rounded corners. Daguerreotypes were normally cased, but beware, over time the cases may have been lost. Also, some photographs are presented in a variety of ways. I have tintypes in my collection which have been cased and presented like daguerreotypes, others that have been mounted onto card and others which have never been mounted.
Colour clues
Look at the colour of your photograph. Is it monochrome? Monochrome can be black and white or warm tones such as brown, purple and blue. Is your photograph colour? The variation in tone of monochrome prints from black and white to warm tones shows the method by which the photograph was made. As a general rule of thumb, black and white prints are usually gelatine, whilst warm toned prints are usually; albumen prints, salt paper prints and cyanotypes. A small word of warning, the colour may never have been 'correct' due to poor processing at the time the photograph was made and the colour of photographs can change as the photographs age.
Close-up clues
Now is the time to get out your
hand held x 10 magnifier. Have a look at the surface characteristics of the photograph. Is it gloss, matt, textured? Are the paper fibres visible? Paper fibres will be visible on albumen prints and platinum prints.
Can you see through the magnifier whether the photograph is layered or not? All photographs are layered but the layered structure becomes more complicated over time:
- Early photographs - support | image layer, e.g. photogenic drawings, cyanotypes
- Mid photographs - support | binder | image layer, e.g. albumen prints
- Later photographs - support | baryta layer | binder | image layer, e.g. gelatine prints
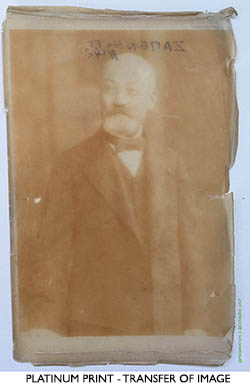
And the final step in your visual examination is to look at how the photograph has deteriorated. How the photograph has aged provides important clues about the processes by which the photograph was made. Albumen prints fissure as they age. Under magnification the surface looks like crazy paving. Platinum prints and platinum toned prints transfer their image onto any papers or boards that they are stored in contact with.
The identification of photographic processes can be daunting at first...
You must use all the tools at your disposal to identify the technique rather than relying on one method. Sometimes it can be difficult to identify the process but your ability to do so will grow with practice and experience. The end result is that you will have identified the photographic processes in your collection and so you will be able to care for and store your photographs correctly, ensuring that they survive into the future.
This is PART 1, you can read part 2 here
If you don't already receive our email newsletter - please subscribe here
This post was written by Lorraine Finch ACR. Lorraine is an accredited conservator of paper and photographs.
You can contact Lorraine Finch in the following ways: E: paperconservation@btinternet.com | W: www.lfcp.co.uk | T: @conserve_lfcp | Facebook: LFCandP